Base mesh and sculpt of the first asset I am working on for the game. Created the base mesh from a front view and three quarter view in Maya then took it to 6 mil polys in zbrush to sculpt the leather seems and to alpha in the rivets. Not sure how the mask will work with it but for the final texture and normal bake i plan to use topogun but not sure how the eyes will work with it, but if it doesn't work out then i will just transfer the maps inside zbrush.
Have an updated version textured on my blog. Any problem with me linking to it from here? Or would you like me to post another screenshot on this one?
ReplyDeleteThe concept for this mask is pretty cool. The execution is not bad. Somethings I would try to push for are overall shapes and contrast. Right now all the lines are pretty much the same strength. Mainly because it was constructed in zbrush. Which is not a bad thing. But you would have way more control on a 3d app such as maya or max. Where hardsurface is more mechanica and precise.
ReplyDeleteThe next thing I would really like to pick on is the presentation. This presentation screams student. All over it. Use a clear font. Like arial or impact. Put your txt on the corners out of the view. Don't use background images. A gradient is fine. People do not need to know if its 6 million polygons in zbrush. Those things are pretty irrelevant now that we all have good fast machines. Your work should be presented in breakdown. High poly, high poly wires ( don't show wires if it was done in zbrush). The low poly, low poly wires. Then the most important sheet needs to be your in game or rendered textured asset. And one final sheet containing all the maps used. Your work should be able to defend itself from any questions people have.
This is pretty good for a 1st model. Keep it up! :)
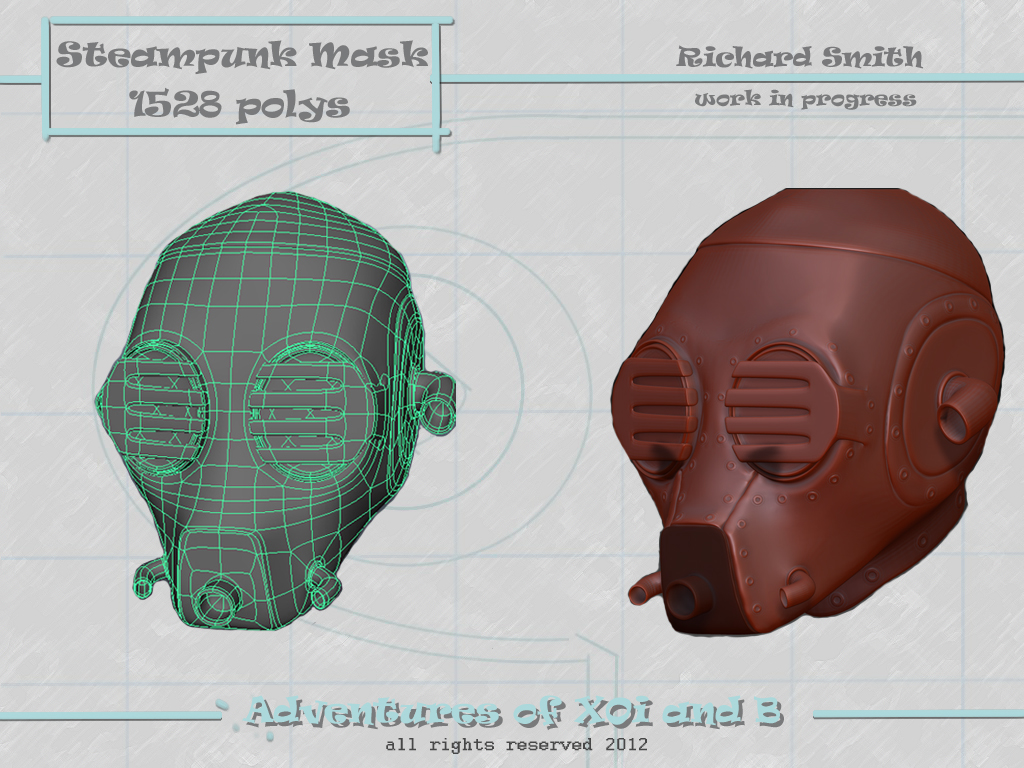
The mask is looking good so far. pretty creepy!I found on google the original mask where you took the ref....I'm without internet at home so I cannot draw notes on the pic. Since this is for a game...it's going to run on the game engine or do you plan to use for a cinematic shot? As far as technical stuff, just beware on the left side corner of the visor...the mesh looks messy in that area, where there is a triangle and a n-gon.
ReplyDeleteDepending on how far you want to go to the polycount, I would say that it could be ok to jam another piece of geometry in the area where the ear is, the "C" shape according to the ref pic. It would add more to the overall form. And indeed machines are pretty fast so you don't need to worry THAT much with polycount. Speaking on that, if you go to polycount.com, there are some very good examples of how to present a game model. As I recall, marmoset (that was the name?) is a nice render engine to showcase game models. Keep it up man!
Its funny you mentioned Marmoset Ricardo, some of the students use that. The masks are going to be static props in the game. There will be 3 or 4 of them sitting in a sleeping quarters area.
ReplyDeleteThanks for the in put there isnt an ngon on the model according to mesh clean up in maya if you want to see a render without the backdrop you can click my user name on here and see it posted on my blog. The polycount on the low res is just over 1300 tris
ReplyDeleteactually I just looked at the wireframe and it does look like an ngon the final one did not have it not sure how that happened good eye :)
ReplyDelete